AutoCAD Tips and Tricks - Modify1. Polyline Multi-functional Grip Editing Options
In previous versions you could only stretch endpoint grips of polyline segments. In AutoCAD 2011 you have additional grips displayed at their midpoints and they all became multi-functional. You can easily add or remove grips (vertexes), convert segments to Arc, etc.
1. Select a polyline in your drawing. 2. Hover over a grip to view all modifying options in shortcut menu: Stretch Vertex, Add Vertex and Remove Vertex. You can also convert polyline segments at its midpoint grips to Arc or back to Line segments. 3. Select one option, e.g. Add Vertex. 4. Left click new vertex to a different location. 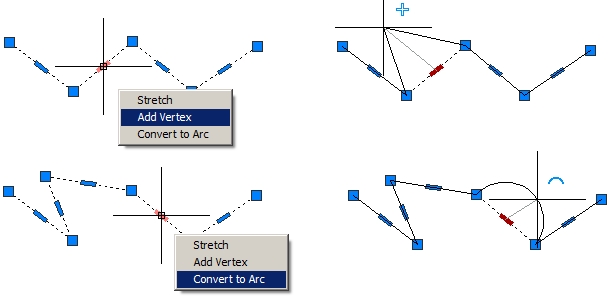
2. Match Properties
You can quickly apply properties of a selected object to other objects.
1. Ribbon / Home tab / Clipboard panel / Match Properties 2. Select source object. 3. Select destination object. You can specify which properties you want to copy to the destination object. 1. Ribbon / Home tab / Clipboard panel / Match Properties 2. Select source object. 3. Specify the Settings [S] option to show Property Settings dialog box. 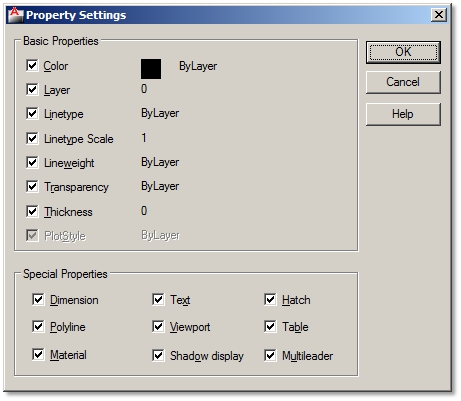
4. Specify properties.
5. Select destination object. 3. Restore the Last Erased Object
If you erased an object using Erase, Block or Wblock command and continued to work before noticing that you shouldn’t have erased it, Undo command won´t bring it back. Type OOPS and the last erased object will be restored.
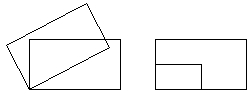
4. Create a Copy of Rotated or Scaled Object in One Step
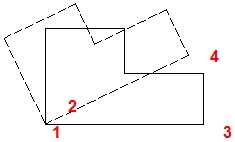
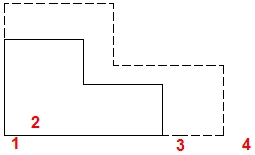
5. Rotate or Scale by a Referenced Angle or Length
If you don’t know the value of an angle to rotate or scale factor to scale your object, you might be able to show them graphically in your drawing. By referencing data you avoid getting it form your drawing (measuring angles and distances and even calculating them).
Rotate by Reference
Scale by Reference
6. Trim and Extend Hidden Options
Trim and extend commands offer many secondary functions which users rarely know about. However, they could speed up your drawing process.
Trim as Extend or Extend as Trim
If you want to trim and extend the same selected objects, you don’t have to use both of these commands separately.
1. Ribbon / Home tab / Modify panel / Trim 2. Select and trim objects. 3. Hold Shift button and select objects to Extend. Trim or Extend to Line Projections
You can easily trim objects, if they end precisely at boundary edges defined by other objects. But if these lines don’t intersect or touch, you will probably extend them first to do so, and then trim them. Well, you can skip the extending part and trim lines to the edge of other line projection.
Extra tip: If extend edge extension mode is on and you´ve selected all objects in your drawing, projections of all lines in your drawing will act as boundary edges. You will probably have a hard time trimming and extending bit by bit towards your desired edge boundary.
7. Copy & Paste Options
You might not know that you can use Copy and Paste commands in different ways.
Copy with Base point
If you copy objects to the clipboard with a predefined base point, you will paste it much easier to the desired position.
1. Select objects. 2. Shortcut menu on your drawing area / Clipboard / Copy with base point or Ctrl+Shift+C 3. Specify base point. 4. Activate another drawing. 5. Shortcut menu on your drawing area / Clipboard / Paste or Ctrl+V 6. Specify insertion point. Paste to Original Coordinates
You can copy objects from one drawing to another to the same coordinates.
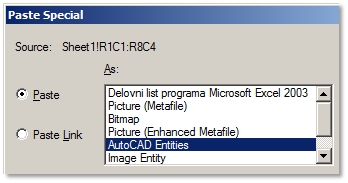
1. Select objects. 2. Shortcut menu on your drawing area / Clipboard / Copy or Ctrl+C 3. Activate another drawing. 4. Shortcut menu on your drawing area / Clipboard / Paste to original coordinates 5. Specify insertion point. 8. Quick Import of Excel table into AutoCAD
A more complex and detailed way of importing an Excel table into AutoCAD is by using the Table command. However, if you´re not too demanding, a simpler way will work just as fine.
9. Rename Various Drawing Items in a Single Dialog Box
Some drawing items such as Layers, Styles, etc. are easy to rename. You just open their Manager palettes or dialog boxes and simply rename them. By doing so, you will have a lot more to click than just simply open one dialog box, where you have a list of all drawing items you can rename. For some items this might even be the only way to rename them.
1. Format / Rename or type in RENAME. 2. Named Objects options / Select item´s category. 3. Items options / Select the name of an item you want to rename. 4. In an empty space below the old name type a new name. 5. Click Rename to button. 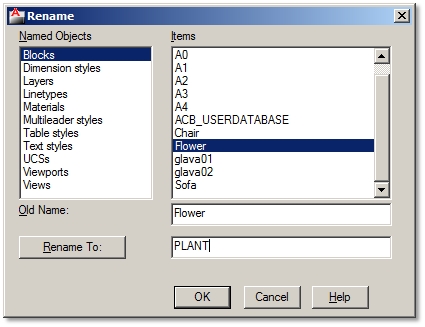
|
Additional AutoCAD Tricks
|

|
|